Colorful Wood Stain: Transform Your Wood Projects with Vibrant Color
Wood stain has traditionally played the role of an impersonator. It makes pine look like walnut, maple look like cherry, and cheap plywood look like something far more expensive. But colorful wood stain breaks that rule entirely, swapping imitation for expression. Instead of chasing a natural wood tone, these products let you lay down deep teal, burnt orange, smoky gray, or crimson directly onto the grain, turning a plain board into a design statement.
What makes this category so appealing is its range. Some colorful stains are translucent dyes that tint the wood while letting every swirl of grain show through. Others are heavily pigmented gels that read almost like paint but still reveal texture. Whether you are refreshing a piece of furniture, building a bold accent wall, or experimenting with a small craft project, understanding how these products behave is the difference between a striking finish and a muddy mess.
How Colorful Wood Stain Works
Stain is not paint, and the distinction matters more than ever when color is involved. Paint forms a film that sits on top of the wood and hides the surface completely. A colorful stain penetrates or bonds with the fibers, depositing pigment or dye inside the grain. That is why a blue-stained oak table still reads as oak, just oak that has been pushed into an unexpected hue.


The final appearance depends on three variables working together: the color of the stain, the natural tone of the wood, and the clarity of the finish on top. A warm amber base under a cool blue stain will shift toward green, while the same blue over pale maple stays crisp and true. Experienced finishers treat the wood itself as part of the color recipe rather than a neutral canvas.
Dyes Versus Pigmented Formulas
Dye-based colorful stains dissolve into a liquid and soak deep into the wood fibers. Because the colorant is so fine, dyes produce vivid, almost glowing results and rarely muddy the grain. The tradeoff is lightfastness. Many dyes fade when exposed to strong ultraviolet light, so a ruby-red dye stain on a sunny windowsill may slowly drift toward pink over several years.


Pigmented stains suspend larger particles of color in a binder. Those particles lodge in the pores and sit closer to the surface, which makes the color more stable but also more likely to obscure fine grain. On open-pored species like oak and ash, pigmented stains can create dramatic contrast as the pigment packs into the grain and darkens it. On tight-grained woods like maple, the same product may look flat and streaky.
Gel, Water-Based, and Oil-Based Options
Gel stains have become the go-to choice for anyone worried about drips. Their thick, mayonnaise-like consistency keeps them where you put them, which is invaluable when staining vertical surfaces such as cabinet doors or table legs. They also give you a longer working window, letting you wipe back and adjust the intensity of the color before it sets.
Water-based colorful stains dry quickly, clean up with soap and water, and produce far fewer fumes than solvent-based products. They tend to raise the grain slightly, so a light sanding between coats is often necessary. Oil-based stains penetrate more slowly, smell strongly, and require mineral spirits for cleanup, but they often deliver a richer, deeper look on dense hardwoods that resist water-based products.


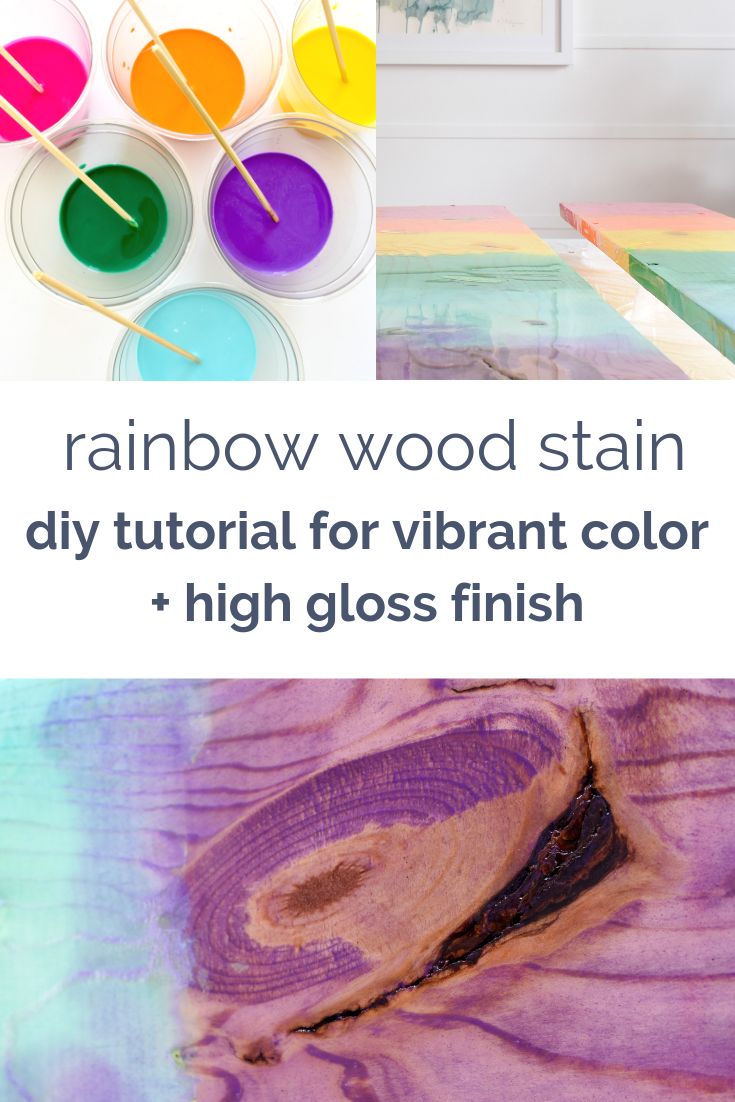


Selecting and Applying a Color That Works
Choosing a color is the fun part, but choosing the right color for your specific piece of wood is the practical part. Two boards of the same species can absorb stain very differently depending on how they were milled and dried. That variability is not a flaw to fight against; it is texture you can use deliberately if you plan for it.
It also helps to decide early whether you want the color to whisper or shout. A thin, wiped-back coat of gray stain creates a weathered, driftwood effect, while three saturated coats of the same product produce something closer to a solid color wash. Build color in layers and stop when the sample matches your vision, not when the can says you are finished.
Testing on Scrap and Prepping the Surface
Never commit a full can of colorful stain to a project without testing. Cut a scrap from an offcut of the actual wood you are using, sand it through the same grit progression as the final piece, and apply the stain exactly as you plan to on the real thing. The same product can look entirely different on a test board of a different species.


Surface preparation determines whether the color goes on evenly. Sand to at least 180 grit, remove all dust, and consider a pre-stain conditioner on blotch-prone woods like cherry, pine, and maple. Conditioner partially seals the surface so the stain absorbs uniformly instead of pooling into dark patches that no amount of wiping will fix.
Layering, Topcoating, and Long-Term Care
Colorful stain almost always needs protection. A clear topcoat of polyurethane, water-based acrylic, or wiping varnish locks in the color and guards against moisture, abrasion, and fading. Water-based topcoats stay clear, while oil-based formulas add a slight amber cast that can warm up a cool blue or green in ways you may or may not want.
Maintenance is straightforward once the finish cures. Dust with a soft cloth, avoid harsh ammonia-based cleaners that can dull the topcoat, and keep pieces out of prolonged direct sunlight when possible. If a surface does wear through, a light scuff sand followed by a fresh coat of matching stain and topcoat usually blends the repair without stripping the whole piece.
Colorful wood stain rewards curiosity more than caution, as long as you test first and build slowly. Pull a scrap of maple or oak from the scrap bin, mix a small batch of that deep teal or smoky charcoal you have been eyeing, and see how it reads against the grain. The results might convince you to retire the brown tones for a while.
Related Articles

Olympic Deck Stain: Transform Your Deck with Long-Lasting Color and Protection
Your quota is exhausted. API key status: exceeded Name: PCTB8QC8QS7ST Quota: 0/3200000000 tokens (0.0%) exp_date: 2026-10-17T14:27:58.134Z

Staircase Painting Ideas: Transform Your Stairs with Stunning Color
Staircase painting is one of those home improvement projects that can quietly reshape an entire house. The staircase is often the first thing guests see, the...

Room LED Light Strips: Transform Your Space with Vibrant Ambiance
Room LED light strips have quietly become one of the most versatile upgrades you can make to a living space, and it is not hard to see why. For a relatively...

Reborn Bath Solutions: Transform Your Bathroom with Expert Remodeling
Your bathroom should feel like a reliable retreat, not a daily obstacle course. For homeowners dealing with outdated tubs, cracking tile, slippery floors, or a...

25 Wood Lathe Projects That Will Spark Your Creativity
Wood lathe projects transform simple blocks and spindles into objects that feel personal, useful, and surprisingly refined. A lathe is one of the few...

ProSlat Wall: Transform Your Garage with Premium Slatwall Storage
If you have ever stared at a cluttered garage and wished the walls could somehow swallow the mess, Proslat wall systems are designed to do exactly that...